Adding an Integration
Integrations are managed by admins at the tenant level under Configuration.
- Go to Configuration in the left-hand navigation
- Select the Knowledge Base tab
- Find the integration type (GitHub, Confluence, or Notion)
- Click + Add connection and enter your credentials
- Save — Orion validates the connection before storing it
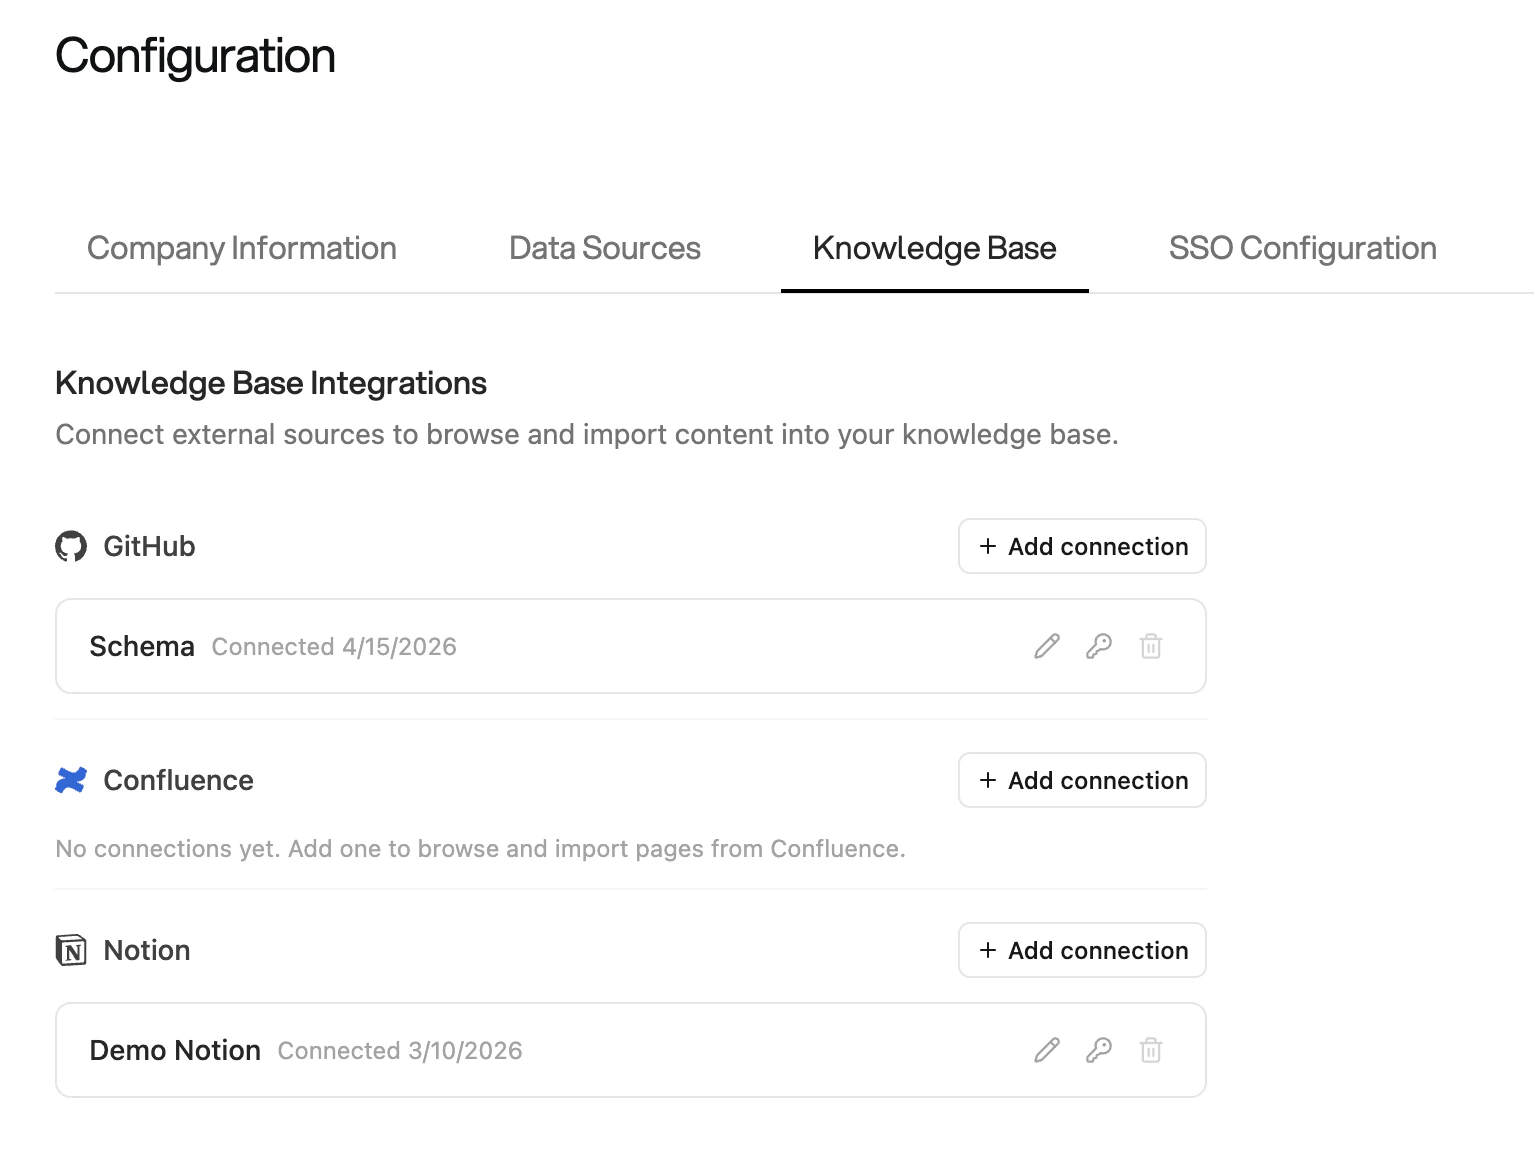
Only admins can add integrations. Connected integrations are available to all
users for browsing and importing content.
 Notion
Setup
Create a Notion internal integration for your workspace, then click + Add connection next to Notion in Configuration → Knowledge Base:- Enter your Integration Token (starts with
secret_) - Give the connection a name
- Save — Orion validates the token before storing it
What You Can Import
- Pages — Imported as markdown with full formatting preserved
- Databases — Rendered as markdown tables with all visible properties
- Child pages — Browse into a page to see nested child pages and sub-databases
Browsing
The root level shows all pages and databases shared with your integration. Click into a database to see its rows, or into a page to see child pages. Confluence
Setup
Generate a Confluence API token from your Atlassian account, then click + Add connection next to Confluence in Configuration → Knowledge Base:- Enter your Base URL (e.g.
https://yourcompany.atlassian.net) - Enter the Email associated with your Atlassian account
- Enter your API Token
- Give the connection a name and save
What You Can Import
- Spaces — Browse all available Confluence spaces
- Pages — Navigate root pages in a space, then drill into child pages
- Page content — HTML is automatically converted to markdown on import
Browsing
The root level lists all spaces your token can access. Navigate into a space to see its root pages, then into each page to see children. GitHub
Setup
Create a personal access token withrepo scope (or read:org for organization repositories), then click + Add connection next to GitHub in Configuration → Knowledge Base:
- Enter your Personal Access Token (classic
ghp_or fine-grainedgithub_pat_) - Give the connection a name and save
What You Can Import
Supported file types:.md, .txt, .docx
- Repositories — Browse all repos accessible to your token
- Directories — Navigate folder structures within a repo
- Files — Import individual markdown, text, or Word documents
Browsing
The root level lists all repositories the token can access. Navigate into a repo to browse its directory structure and select files to import.Importing Content
Import from an external source when creating a new page in the Knowledge Base:- In the Knowledge Base, click + to create a new page
- Select the GitHub, Confluence, or Notion tab at the top of the panel
- Choose a connection from the dropdown (or click + to add a new one)
- Browse the list of pages and select one — a preview loads on the right
- Choose an import mode and click to import
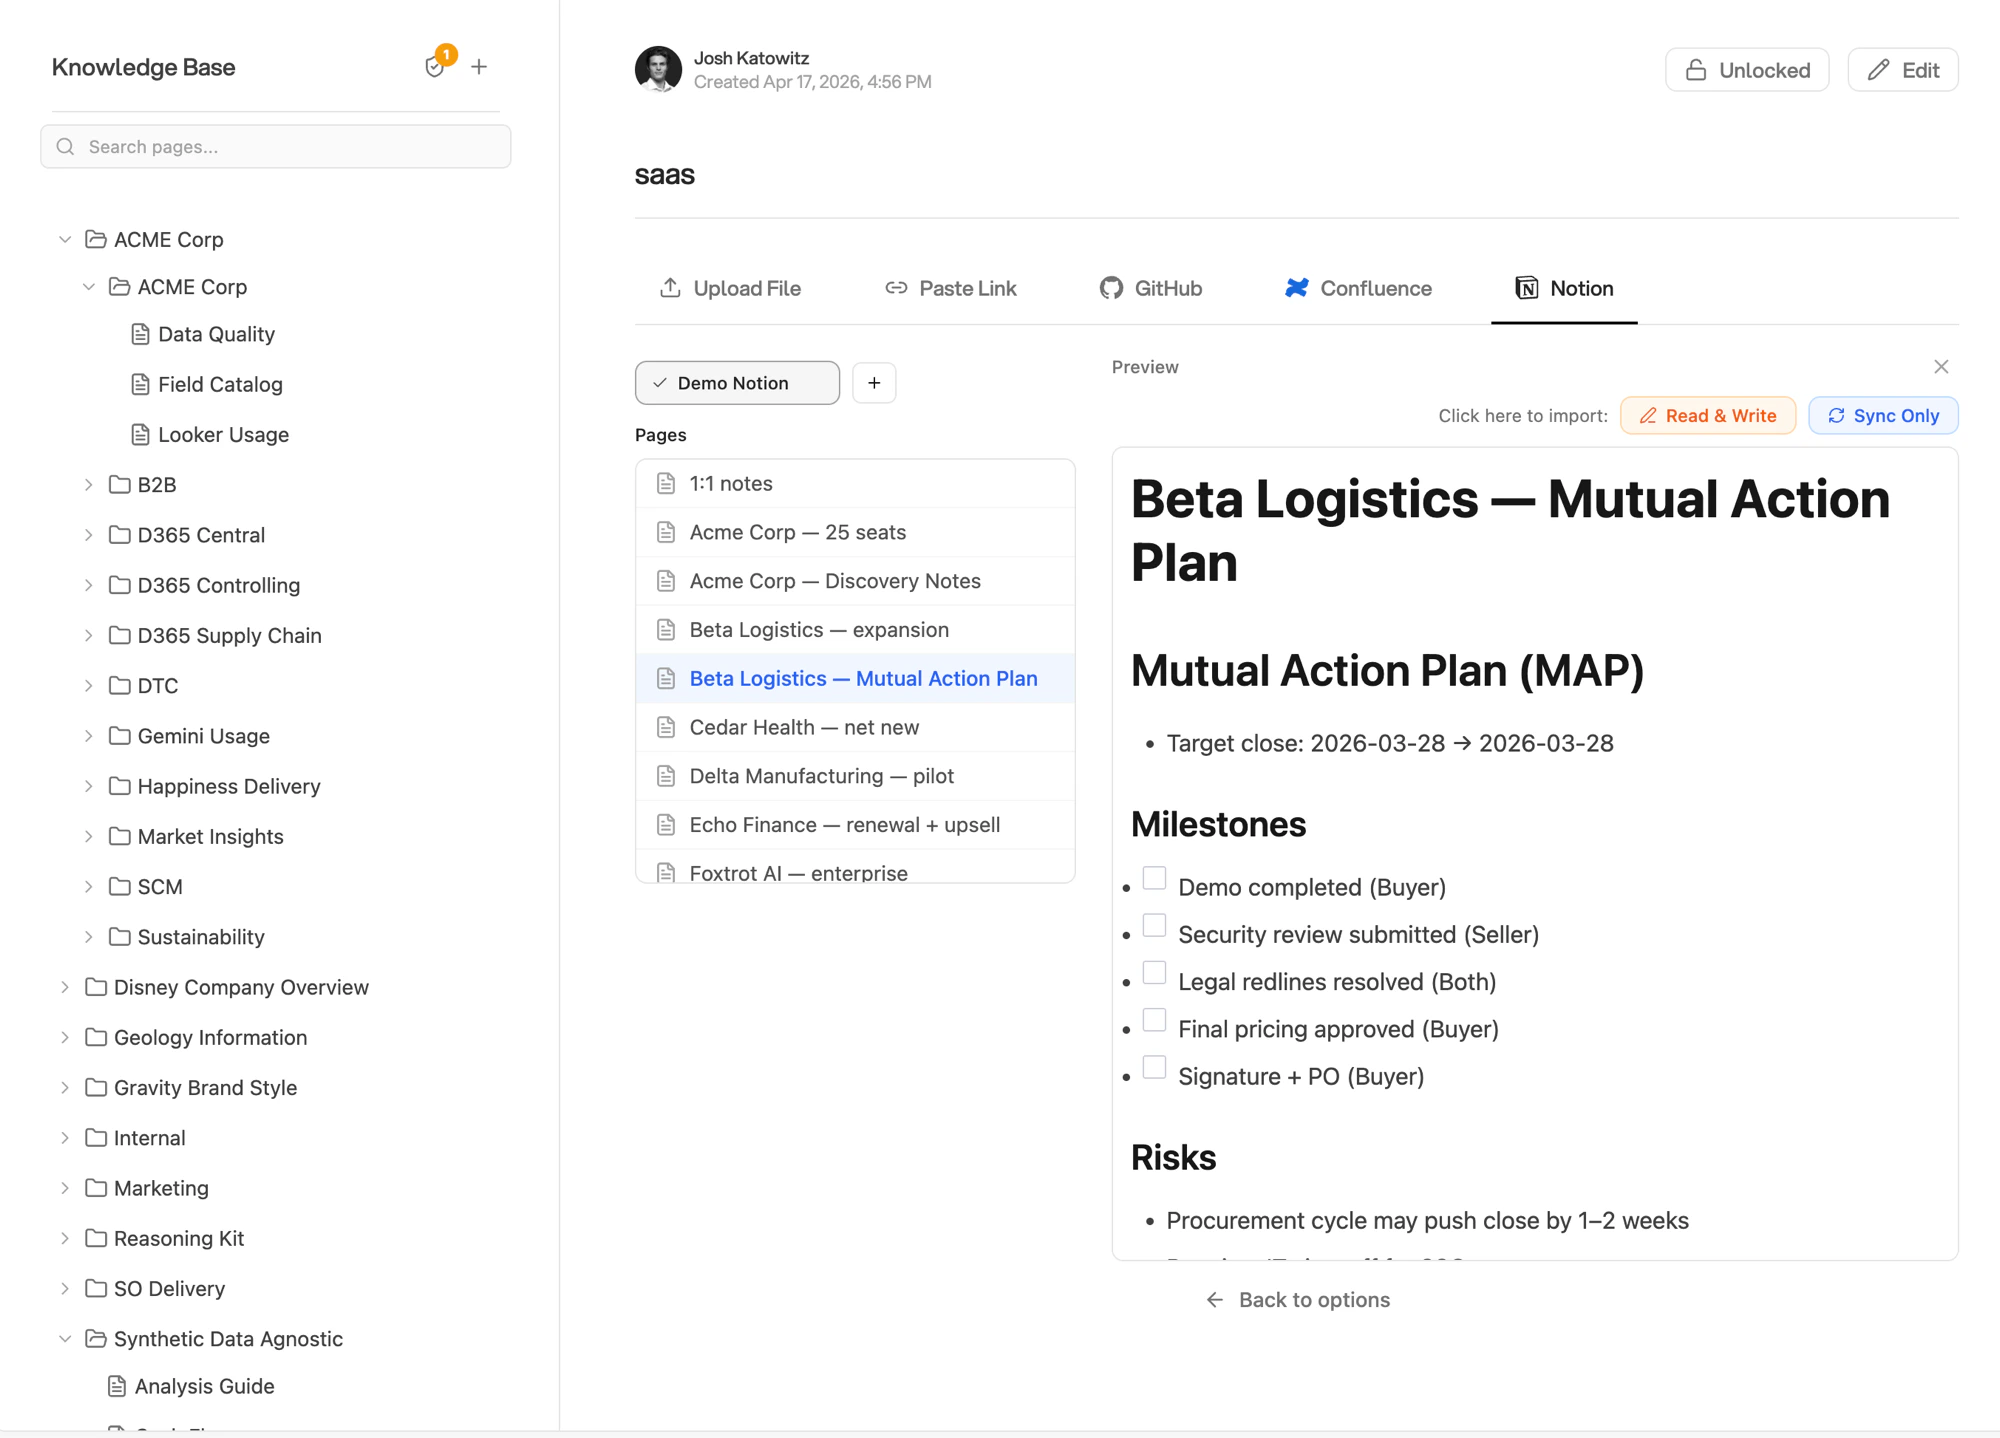
Import Modes
When importing, you choose how Orion handles the page going forward:
Use Sync Only when the source is the authoritative version and you want the Knowledge Base to always reflect it. Use Read & Write when you want to import once and then own the content in Orion.
Syncing Pages
To refresh a Read & Write page with the latest content from its source:- Open the page in the Knowledge Base editor
- Click Sync in the top toolbar
- The page content is overwritten with the current version from the source
Syncing overwrites the page content entirely. Any manual edits made since the
last sync will be lost.
Managing Integrations
From Configuration → Knowledge Base, each connection has three actions:- Rename (pencil icon) — change the display name of the connection
- Browse (link icon) — open the integration browser to import more content
- Delete (trash icon) — remove the connection. Pages already imported are kept, but they can no longer be synced.