

Before you start
Create an OAuth application in your identity provider first. Orion uses the authorization code flow and requests theopenid, email, and profile scopes.
Register this redirect URI on that application:
Your identity provider must report the user’s email address as verified. Orion rejects a sign-in when the token does not confirm this, because an unverified address could belong to another user.
Create any Groups you plan to assign through SSO before you configure the provider. The mapping editor only lists groups that already exist.
Accessing SSO Configuration
Only tenant Admins can access SSO Configuration. A group administrator without the tenant Admin role cannot open it.- Open Configuration in the left-hand navigation menu
- Select SSO Configuration in the Admin Settings sidebar
On a shared trial tenant the SSO Configuration entry appears but stays
disabled. Sign-in providers are configured per tenant, and a trial tenant is
shared with other companies.
Adding an OIDC provider
- Click Add OIDC Provider, or Add Your First OIDC Provider for the first one
- Enter a Provider Name. The login page displays it after Continue with, so choose a name users will recognize
- Enter the OIDC Issuer URL, OAuth Client ID, and OAuth Client Secret
- List the domains you admit under Allowed Email Domains, pressing Enter, Tab, or comma after each one
- Click Create Provider
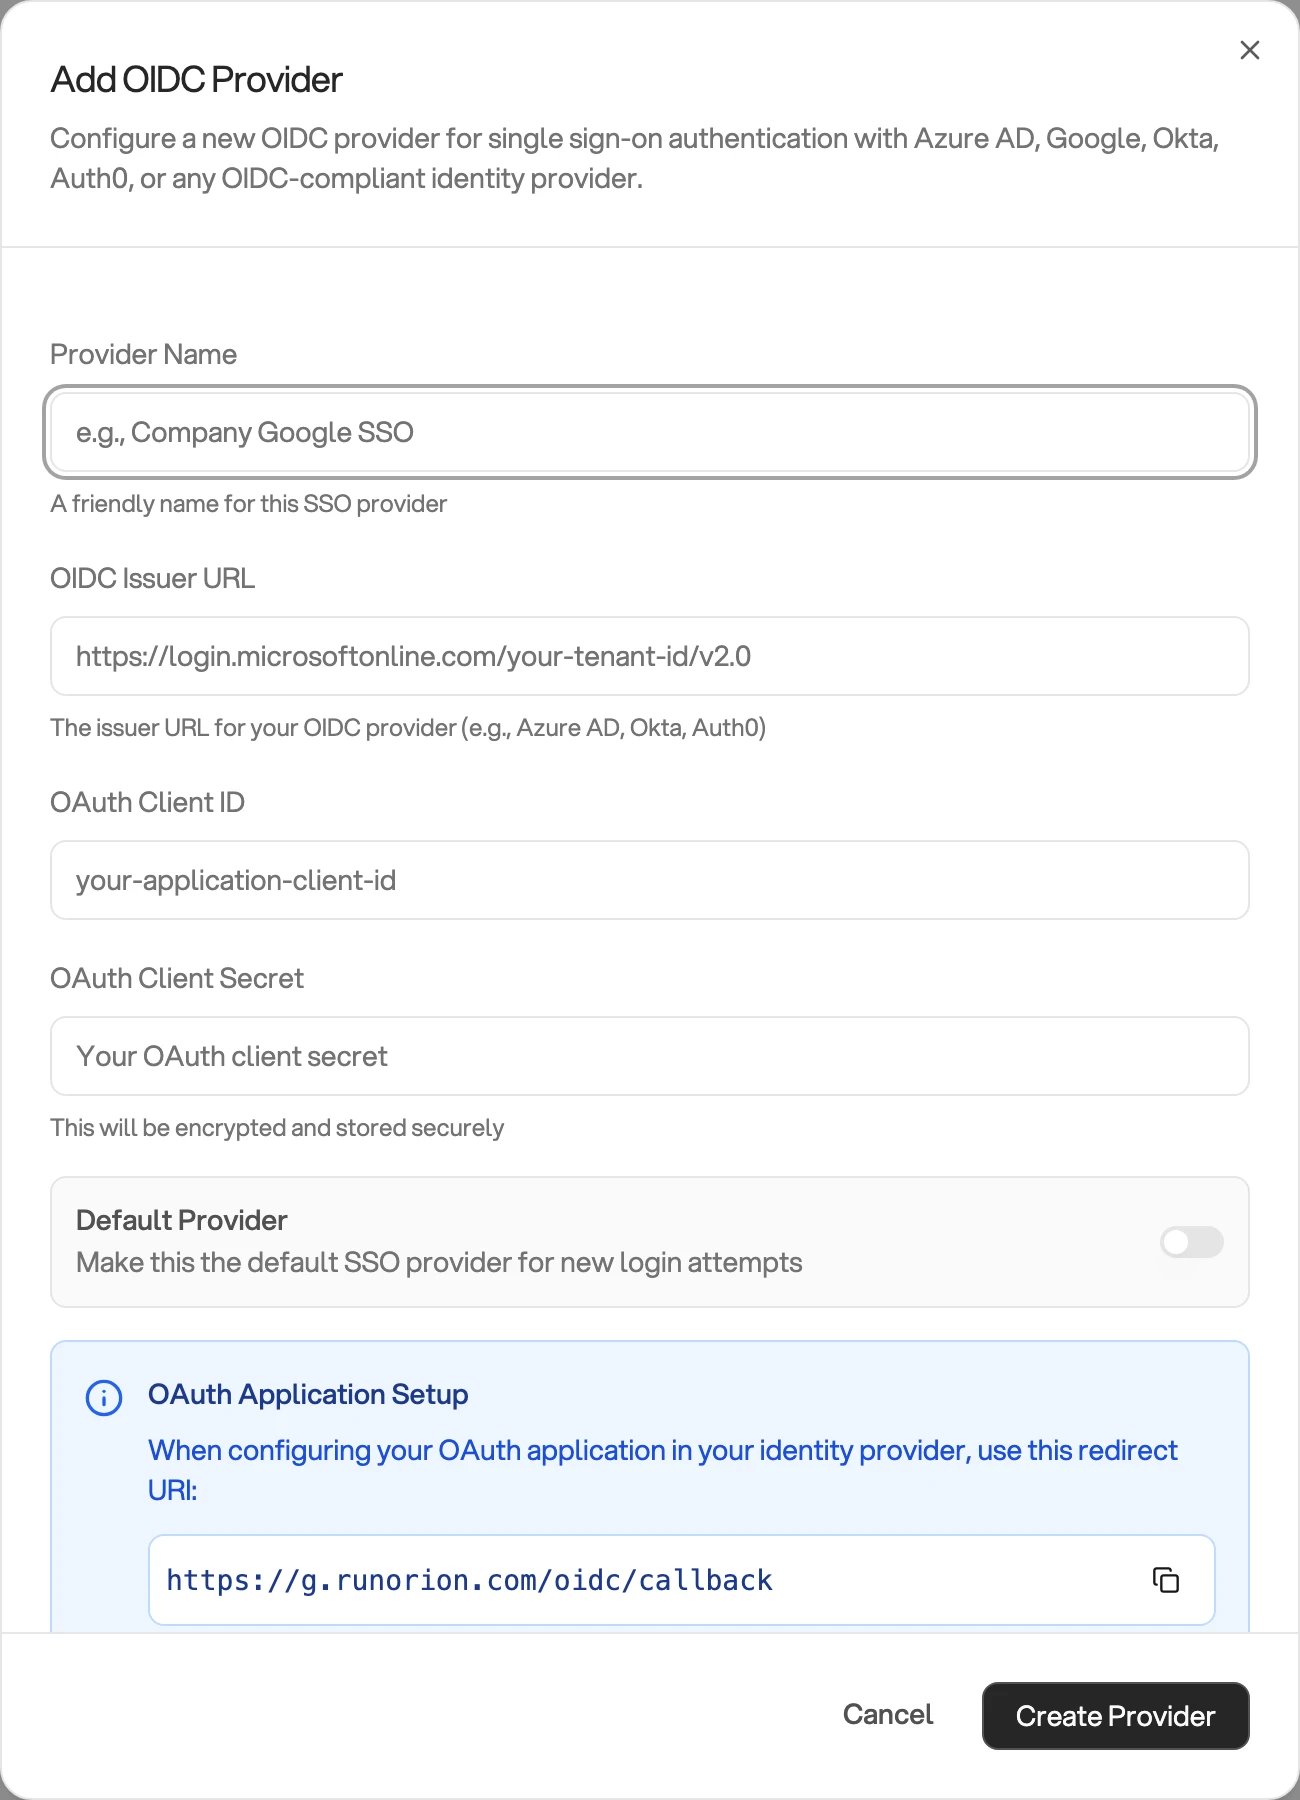
Example OIDC provider configuration
Restricting who can sign in
Allowed Email Domains controls which email domains are eligible to sign in. Orion rejects other domains before creating or reusing an account and tells the user to contact their administrator. Users at an allowed domain can sign in without an invitation if they also satisfy any group mappings. Only add domains you control. Orion highlights allowed domains that are not also portal visitor domains in an amber notice. Review this notice for domains that should have portal-only access.Portal visitor domains
A portal visitor can only open pages shared with them. To give external users portal-only access, add their domain to both Allowed Email Domains and Portal Visitor Domains in Configure. If Allowed Email Domains is empty, add the domain only to Portal Visitor Domains, but remember that every domain your provider authenticates remains eligible to sign in. New users from allowed domains that are not on the visitor list receive Viewer accounts. Existing Orion accounts keep their current tenant role.Mapping domains or claims to groups
Open Configure for the provider. The Group Assignment section offers two options: Map domains to groups and Map claims to groups. Both create a table where each row defines a value, Group, and Role. Map domains to groups uses thehd claim. When a provider omits hd, Orion derives the value from the user’s verified email domain. For other values, use Map claims to groups and enter a Claim Name the provider sends, such as groups or department.
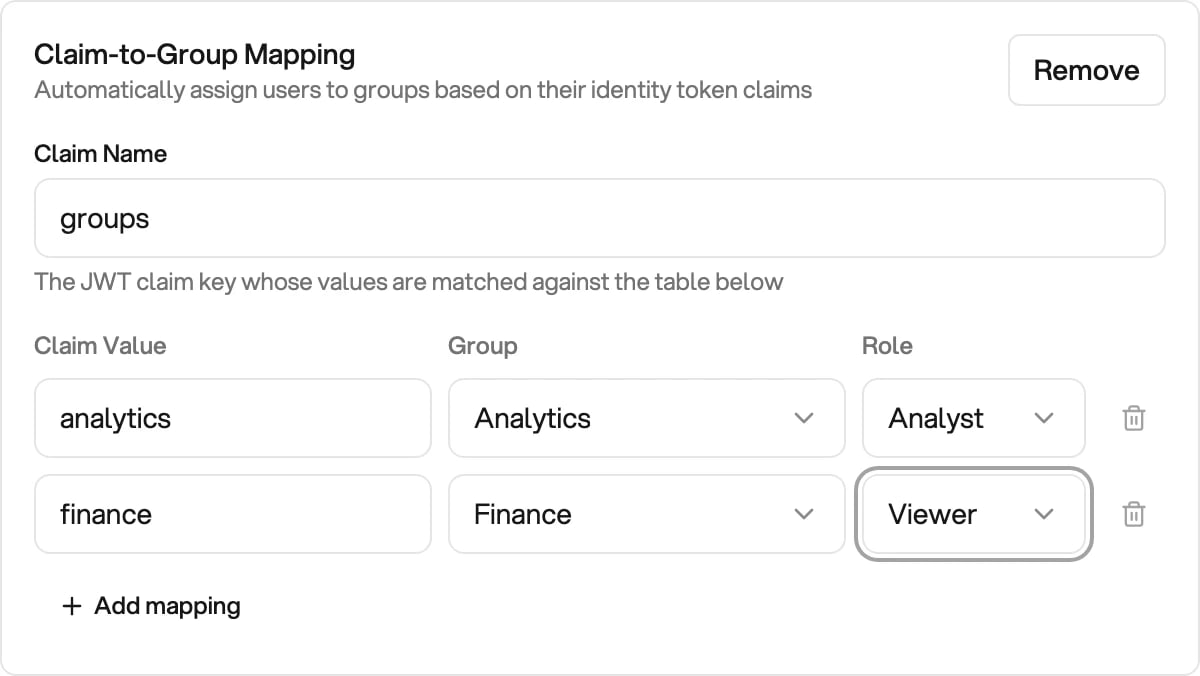
Example claim-to-group mappings
What happens when a user signs in
When no matching Orion account exists, the first sign-in creates one. New users from a portal visitor domain receive the Visitor tenant role. All other new users receive the Viewer tenant role. Later sign-ins never change that tenant role. Change tenant roles from Manage Users when users need more access. Group memberships managed through SSO are refreshed at every sign-in. If the email address matches an existing Orion account, Orion reuses that account and keeps its current role. Email matching ignores letter case.Password sign-in stays available alongside your SSO buttons. Ask your Gravity
contact if you want the login page to offer single sign-on only.
Enabling, testing, and deleting a provider
Each provider row includes Configure, a Details accordion, and an Enabled or Disabled badge. Expand Details to view the issuer, a truncated client ID, and two actions.- Configure edits everything, including the Enable Provider switch. Leave OAuth Client Secret empty to keep the secret you already stored.
- Test Connection confirms that the provider record exists and is enabled. It does not perform a sign-in or validate credentials. The button is unavailable while a provider is disabled.
- Delete Provider asks for confirmation, then removes the provider.
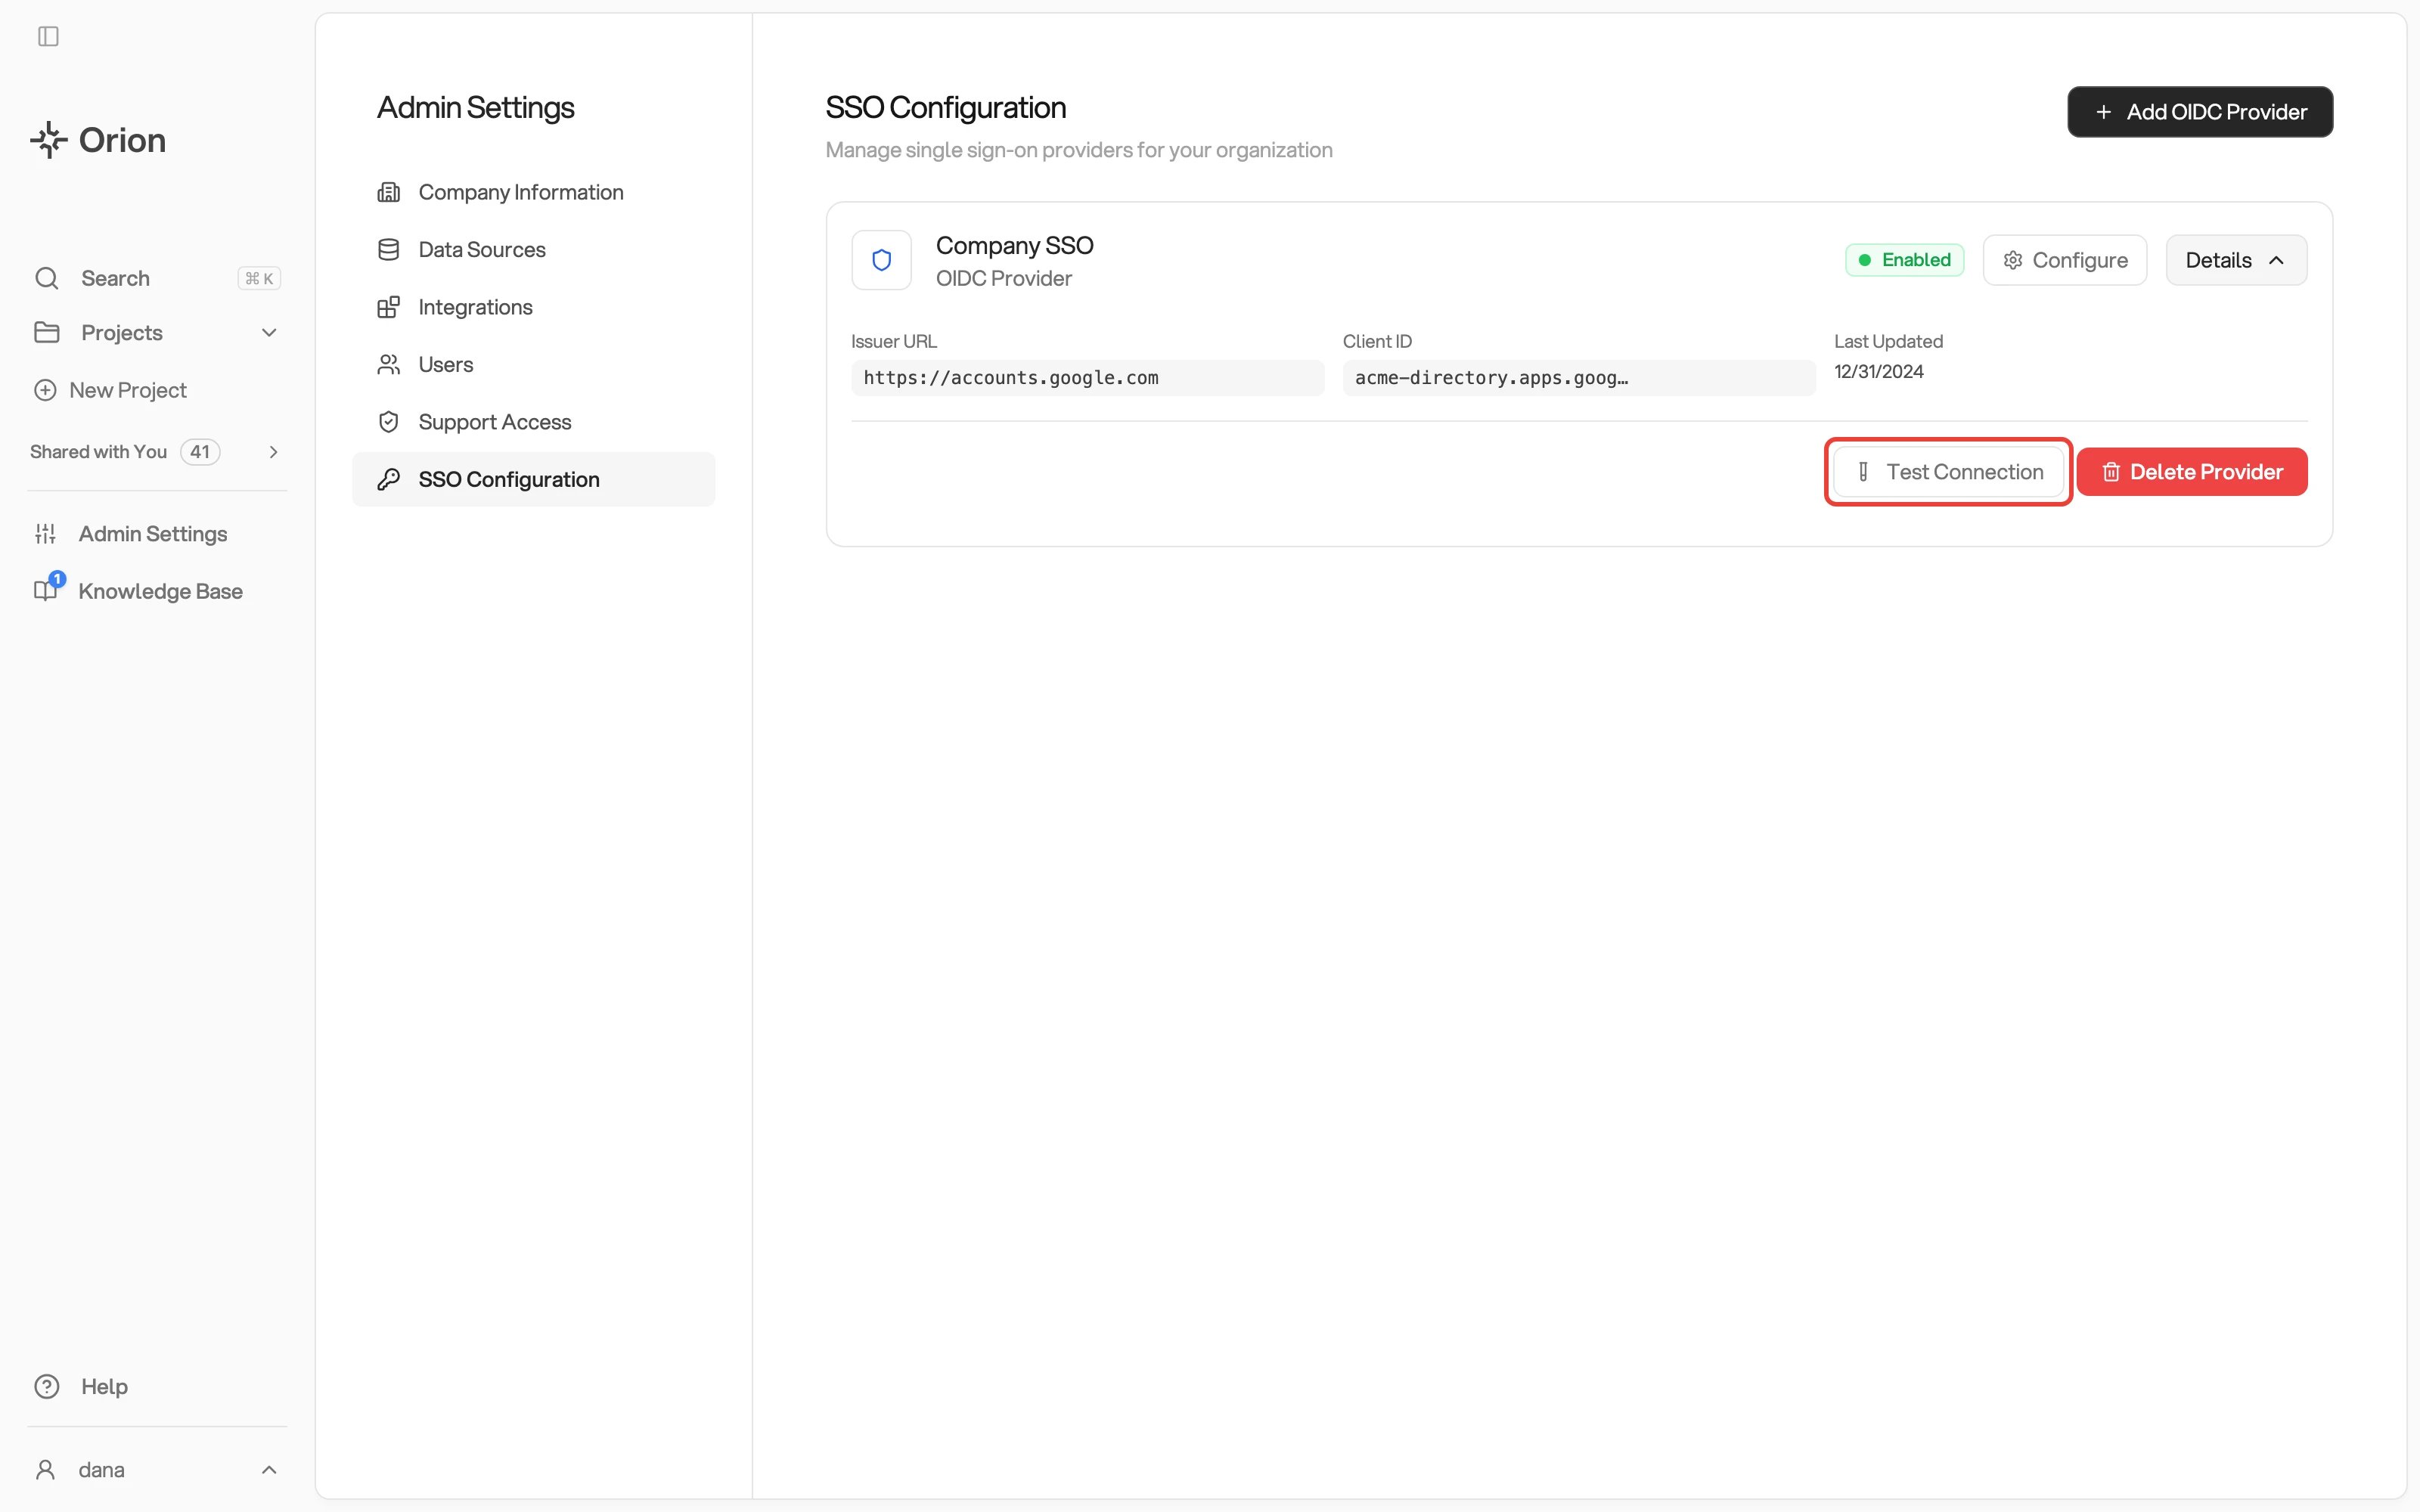
Example configured SSO provider
When a change takes effect
Provider changes can take up to five minutes to appear on the login page, because it caches the list of enabled providers for five minutes. This delay applies when you add, rename, enable, or disable a provider. Domain rules and group mappings apply at the next sign-in. They do not affect existing sessions.Troubleshooting
When Orion rejects a sign-in, it displays the reason and tells the user to contact their administrator:
If sign-in fails after Test Connection passes, check the redirect URI, client secret, and scopes on the OAuth application.
If a change locks every administrator out of your tenant, contact Gravity support.
Next Steps
Groups
Create the groups your claim mappings assign, and see what each group role
can reach
User Management
Set tenant roles, invite the users your provider does not cover, and audit
who has access