A Workflow takes an analysis you have already validated and re-runs it on a schedule, producing a fresh deliverable each time. Where a notebook is the record of one analysis, a Workflow is a saved recipe: the data source queries, the notebook code, any metric references, and the instructions for formatting the output. Every run re-queries your data and regenerates the result. The recipe being fixed is the point. A Workflow re-runs the notebook you already checked rather than working the analysis out from scratch each time, so the same queries and the same transformations produce this week’s numbers. You are not asking a question twice and hoping the answers are comparable. What Orion writes fresh is the narrative around the numbers, and you can constrain that too: a report can follow a template for its layout and a Knowledge Base page for its style. Use a Workflow when someone needs the same answer on a repeating cadence: a Monday morning revenue report, a daily pipeline dashboard, a monthly board deck.
Workflows are in beta, marked v2 Beta on the project page. Existing Workflows keep running, but expect the interface to keep moving.

Notebook vs Workflow

A Workflow always starts from a notebook, so get the analysis right in chat first. See Running Analyses.

Creating a Workflow

Two ways in: click Create Workflow in the notebook panel, or ask Orion in chat. Both call the same thing underneath, so pick whichever is faster in the moment. Asking is quickest when you already know what you want. In the chat where the analysis ran: “save this as a workflow that runs every Monday at 8am and outputs a dashboard.” It also handles schedules the dialog cannot express. The dialog is the guided version. Once an analysis is correct, open the notebook panel in Chat. At the top you will find Save as a Workflow. Click Create Workflow.
A chat with the Analysis Notebook panel open on the right. The Save as a Workflow section and its Create Workflow button sit at the very top of that panel, highlighted, above the notebook's variables, referenced metrics, data extractions, and executed cells
The dialog asks for three things:
1

When it should run

Pick Hour, Day, Week, or Month. Week adds a day picker, Month adds a day of the month, and Hour asks only for the minute it should fire on. Your local timezone is preselected.
2

What it should output

Choose Markdown Report, Slide Deck, or Dashboard. This is the format the Workflow regenerates on every run.
3

When to notify you

Describe in plain language what makes a run worth an email, for example “only notify me if revenue changes by more than 10%”. Leave it blank to decide later.
Create Workflow dialog showing the run frequency, time and timezone pickers, the Markdown Report, Slide Deck and Dashboard format choice, and a plain language notification preference field
Submitting the dialog writes exactly that kind of request and sends it to Orion, which is why the two routes behave the same. Orion builds the Workflow from there. Only cells that ran cleanly make it in, so anything that errored is left behind, and Orion does a full dry run before saving. If that dry run fails nothing is saved and Orion tells you what broke.

The Evergreen Check

A Workflow that hardcodes last quarter’s dates would keep reporting last quarter forever, so Orion reviews the analysis for that before saving. You do not have to ask. The check looks for hardcoded dates and date ranges, filter values and IDs that came from your specific session, and hardcoded file paths, and it rewrites them to relative equivalents: a fixed 2026-01-01 cutoff becomes a rolling window. Writing the analysis this way from the start is still cheaper than having it corrected. See Use Relative Dates.

Output Formats

Markdown Report

A written report. Best for narrative findings that someone will read top to bottom.

Dashboard

A styled web page of charts and tables. Best for numbers people check at a glance.

Slide Deck

A presentation. Best for recurring meetings where the analysis gets presented rather than read.
The dialog picks the format a Workflow starts with, not the only thing it can ever produce. A Workflow can carry several outputs at once, including an audio briefing, and it can carry data exports such as a CSV alongside them. Each one is a separate step on the graph, with its own format you can change later.

Templates

Format decides what kind of artifact a run produces. A template decides what it looks like. Attach one to a slide deck or a dashboard and every run comes back in that layout and theming, which is the difference between a weekly deck that looks like the same deck and one that gets redesigned behind your back. Templates are optional. With none set, Orion lays each run out from scratch, which is fine until the same deck starts going to the same meeting every week and people navigate it from memory. You can attach one later or clear it again without touching the analysis underneath. Open an output step and set Artifact Template in its Report Configuration. Templates are saved per project, and you get them two ways: upload an HTML file, or generate a deck or dashboard you like in chat and use Save as template to keep it. Only slide decks and dashboards take a template, so the option does not appear on markdown reports or audio briefings.

Finding Your Workflows

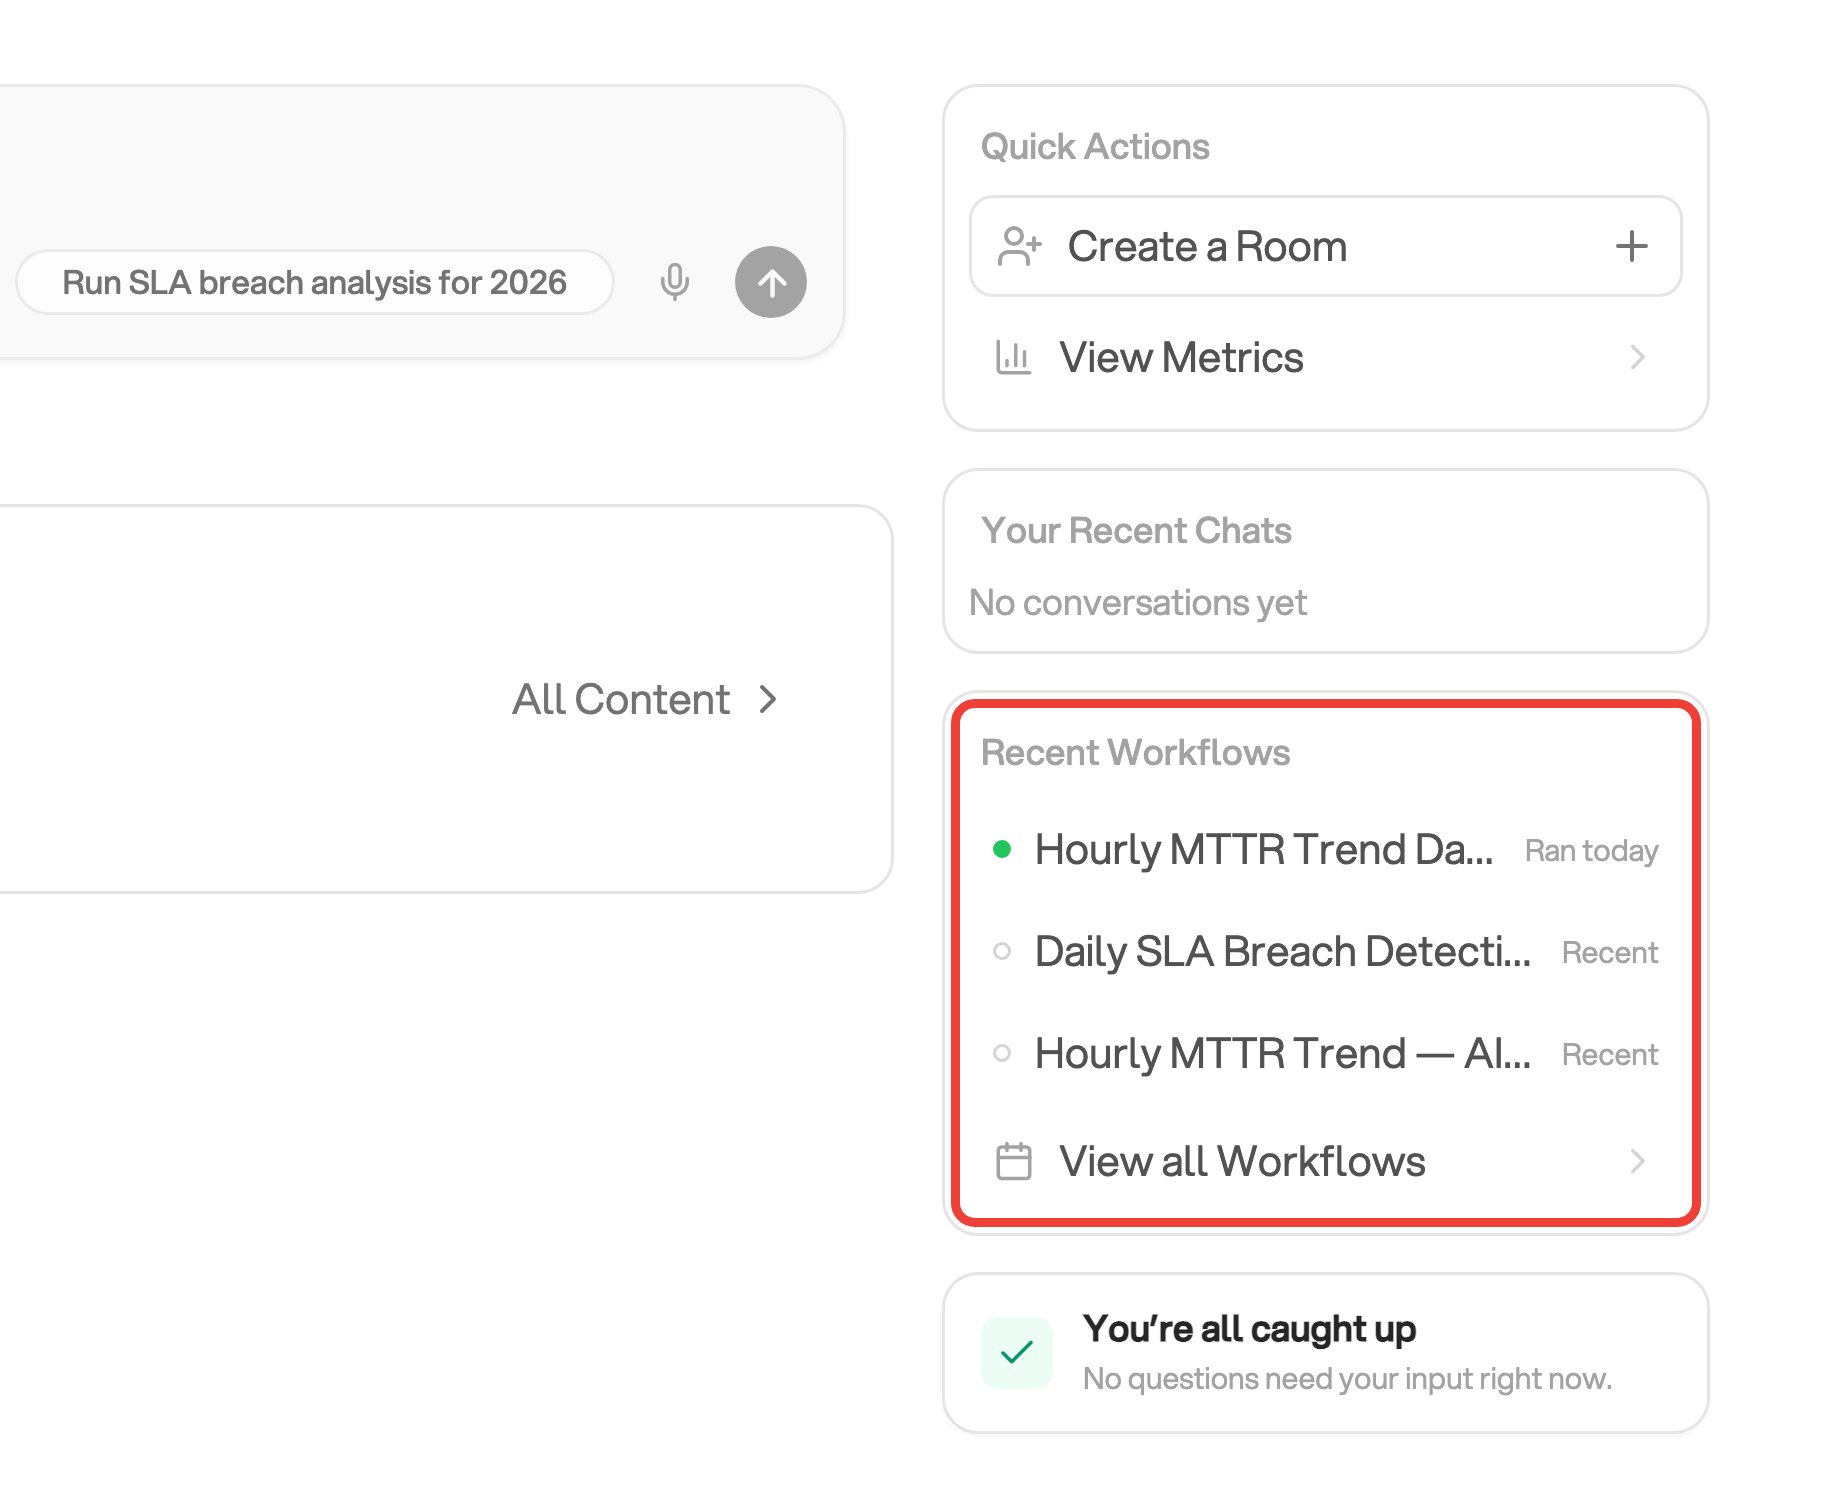
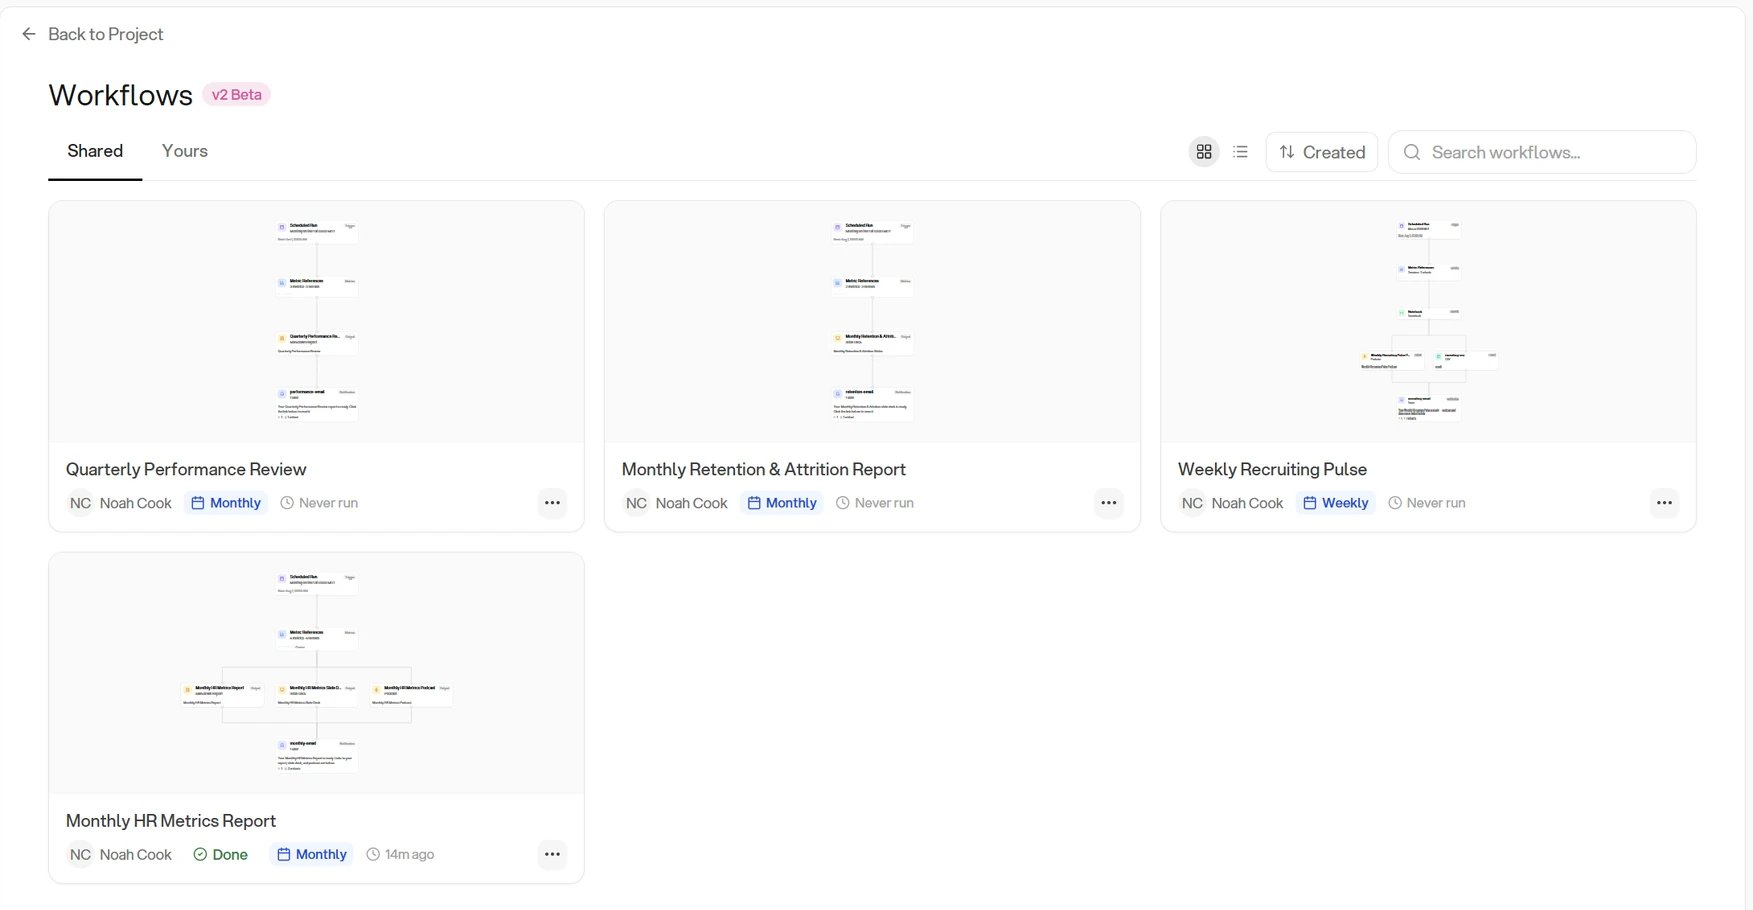
Workflows live in the Workflows section of the project page, below Shared Metrics and Published Content. The Shared and Yours toggle at the top of the page switches between Workflows the project shares with you and your own. View all opens the full list. They are also indexed in Search under the Workflows filter. Each entry shows its name, who created it, its schedule, the outcome of the last run, and when that run happened. A Workflow that has never run says so. A Workflow starts out private to you. Use Move to Shared Board on the entry to hand it to the rest of the project, or Make Private to pull it back.
A project page with the Shared and Yours toggle near the top and the Workflows section highlighted at the bottom, below Shared Metrics and Published Content. The section carries a v2 Beta badge, a View all link, and one entry listing a weekly schedule, a succeeded status, and a last run two days ago
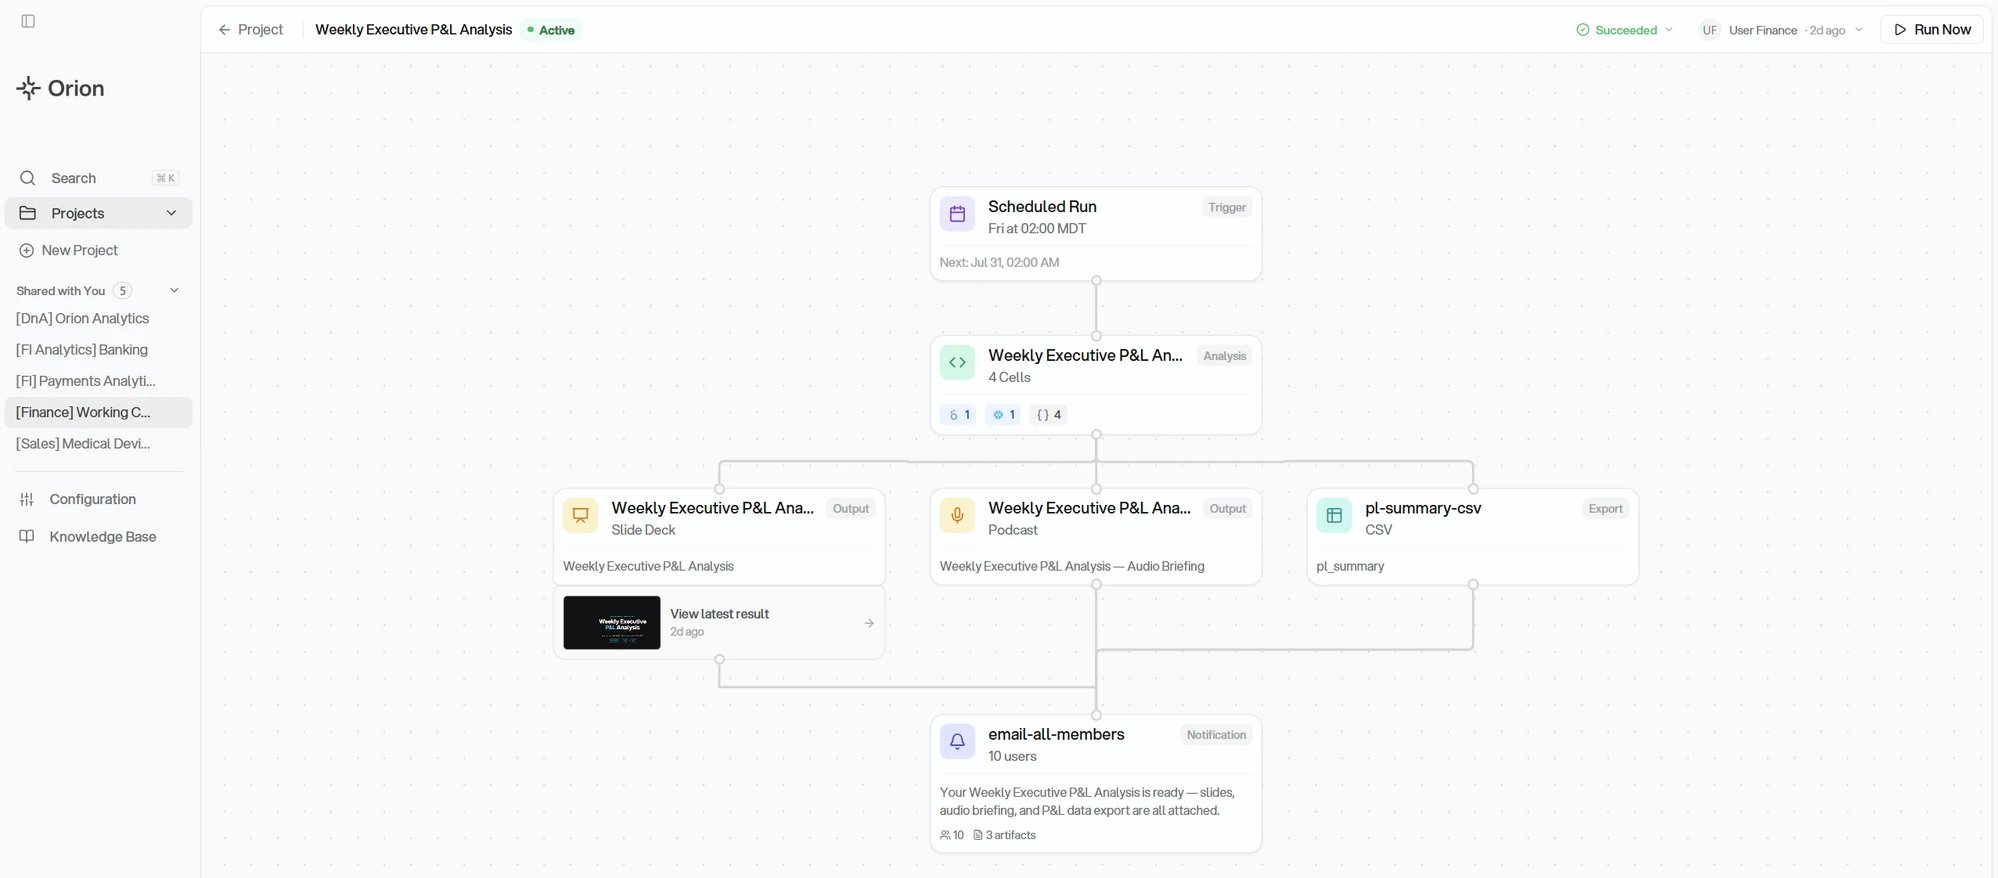
Click a Workflow to open it. The view lays the Workflow out as a graph: the trigger that starts it, the analysis it runs, each output and export it produces, and who gets notified. The header carries the status of the last run and a Run Now button.
Workflow view showing a graph of connected steps: a Scheduled Run trigger, the analysis it runs, slide deck and podcast outputs, a CSV export, and an email notification step
Click any step to open its configuration. This is where a Workflow is edited: the trigger holds the schedule, each output step holds a format and its latest result, and the notification step holds the message and its recipients. You can also add steps, so a Workflow that only writes a report today can gain a CSV export or a second notification later. The analysis step in the middle is the recipe. It shows the notebook name, how many cells run, and a badge for each kind of data source the cells query, which is the fastest way to see what a run touches without opening the code.
Opening a Workflow requires Analyst or Admin on the project. Viewers cannot open one at all, not even read-only. Your level can come from a group, so being a Viewer elsewhere in Orion does not necessarily mean you are one here. See Project Permissions.

Running and Scheduling

The Scheduled Run step at the top of the graph is the trigger. It shows the cadence, the time, and the timezone the Workflow runs in, along with the date of the next run. Open it to change any of them. The schedule offers None, Hourly, Daily, Weekly, Monthly, and At times. A few details worth knowing:
  • Daily lets you restrict which days actually run, so weekdays-only is a daily schedule with the weekend deselected.
  • Hourly runs on an interval, from every hour up to every 12 hours, on a minute you pick.
  • At times runs at several specific times in the same day rather than on an interval.
  • None disables the schedule without deleting the Workflow or its history. Run Now still works.
  • Times display in your local timezone and are stored converted, so a schedule set in New York does not drift for a teammate in London.
  • Schedule changes are not saved until you confirm them.
Run Now in the header triggers an immediate run without touching the schedule. Use it to confirm a change worked, or to refresh a number ahead of a meeting. Runs happen in the background, so the result appears once it completes rather than instantly. The status in the header opens the run history. Each entry shows the outcome, Succeeded, Failed, Partial, or Running, and whether it was scheduled or a manual run, so you can tell an automated result from one someone triggered by hand.
The Workflow header with its run status highlighted, and the Run History panel it opens listing eleven runs, each showing a succeeded status, how the run was triggered, and how long ago it happened

Checking a Run

Open a run from the history to see its steps. Each step reports whether it completed and how long it took, and steps that produced something carry a View link straight to that artifact.
Run Details panel showing a succeeded scheduled run that took three minutes and forty-eight seconds, broken into three completed steps with per-step durations and a View link on the step that produced slides
When a run fails, the failure surfaces on the Workflow entry on the project page. Open the failed step to see the error that stopped it. Common causes are a data source that went unreachable, a schema change, or credentials that expired. See Troubleshooting. Partial means some steps finished and others did not, so it is always worth opening to see which.

Notifications

When a run finishes, a Workflow can email the result out. Open the Notification step on the graph to control what gets sent and who gets it:
  • Message: the body of the email that goes out, which you write yourself.
  • Artifacts: which of the Workflow’s outputs and exports get attached. Each report and export is a checkbox, so a Workflow that produces three things can send all three or just one.
  • Recipients: who receives it, chosen as Users, Groups, or Emails. Users covers people already on the project, searchable by name or email, and Groups covers the project’s groups. Emails takes any address you type, which is how you reach someone outside the project.
Notification Configuration panel showing the message body, three artifact checkboxes for two reports and one export, and recipient tabs for Users, Groups, and Emails with a member search field

Notification Preference

Recipients control who gets email. A notification preference controls when. Write it in plain language when you create the Workflow and Orion turns it into a condition that gets evaluated on each run:
  • “Only notify me when there is a significant change”
  • “Only if churn goes above 5% or a new anomaly shows up”
  • “Always notify me”
A Workflow with no condition set notifies on every run.
Delivery is email only. Workflows do not post to Slack, Teams, or SMS. For a broader summary of a project’s activity, see Email digest.

Shaping and Publishing the Result

Opening an output step gives you its Report Configuration, which is where you control how the result is written and where it lands.
  • Report Style: formatting, structure, length, tone, and emphasis, in plain language. This is the main lever for what the output reads like. “Executive summary, one page max” and “five slides for a board meeting” both belong here.
  • Publish URL: the address the result is published at, /share/ plus a slug you choose. Set it to something recognizable like weekly-revenue.
  • Report Visibility: who inside the project can view the result.
  • Context Sources: the notebooks behind the report, plus any Knowledge Base pages you attach as ground truth and the template covered above.
Because the Publish URL is stable and every run republishes to it, one link stays current forever. That is what makes a Workflow worth handing to someone who will never open Orion.
Changing the slug moves the report. Links you have already shared point at the old address and will stop working.
A run’s output is also reachable from the graph itself: each output step carries a thumbnail of its most recent result, and View latest result opens it. Published outputs appear in the Published Content section of the project page too.

Editing a Workflow in Chat

Some changes are easier to describe than to click. Open in Chat, at the bottom right of the graph, drops you into the project chat with the Workflow already referenced and a prompt started for you.
Project chat input prefilled with a request to change a workflow, the workflow itself shown as a reference chip inside the message
You can do the same from scratch in any project chat by typing @ and picking the Workflow, the same way you reference a metric or a Knowledge Base page.

Working With Workflows Elsewhere

The MCP server exposes Workflows to AI assistants like Claude Code and Cursor. You can list them, read their configuration, trigger runs, and pull execution results. See MCP Tools.

Deleting a Workflow

Delete removes the Workflow and its entire run history, and cannot be undone. If your goal is only to stop the emails and the scheduled runs, set the schedule to None and clear the notification’s recipients instead. That keeps the recipe and its history intact so you can start it again later.

Next Steps

Running Analyses

Get the analysis right before you save it as a Workflow

Best Practices

Write evergreen analyses that survive being re-run

Knowledge Base

Attach definitions and business rules a Workflow can rely on

Email Digest

Get a recurring summary of a project’s insights